Pages

Showing posts with label wvw. Show all posts

Friday, June 12, 2015

Guild Wars 2 : Epic Ranger WvW Montage Vol.1 by Lord Hizen

Ranger WvW Montage

Guild Wars 2 ranger wvw, power massive build vs all classes, duel's, high dps, japanese anime voices, roaming, show how to play with ranger skill's.

* account name: ahmary.3901
*character name: Hizen Lord

Thank you for watching i hope you gooing to love it ^_^

Friday, June 5, 2015

Gw2 - Legendary Warrior WvW Gameplay Showdown! TDM vs BAMBI by Tap Dat Mouse

Guild Wars 2 (Gw2) Legendary Warrior Gameplay TDM vs BAMBI WvW Showdown Commentary! Stream Montage! 

Ultimate Legendary Roaming Warrior Build 3.0 featured! 

BEST Warrior Unkillable regen Build with Crazy DPS!

Build: https://www.youtube.com/watch?v=sIEau...

----------------------------------------
­----------------------------------------­--
Get Gungho for 50% off and Free Shipping at http://www.gogungho.com/TDM

Watch Me Live On: http://www.twitch.tv/TapDatMouse
Buy My Shirts: http://tapdatmouse.spreadshirt.com

Contact and follow me:
Twitter: https://twitter.com/TapDatMouse
Facebook: https://www.facebook.com/Tapdatmouse
Instagram: http://instagram.com/tapdatmouse
Email: Tapdatmouse@gmail.com

Saturday, October 5, 2013

Guild Wars 2 - Server Transfers Price Reduction


Until the day before the inaugural World vs. World Season, we’re reducing the prices for moving to a new home server! Transfers to a Medium population world are free, and moving to a High population server has been discounted to just 800 gems but only until October 17!

You can transfer worlds using the World Selection button on your character selection screen. ~RB2

Saturday, September 28, 2013

World vs. World Season 1 Begins October 18


Hello WvW players,

I’m here to make an announcement regarding season one of World vs. World. After careful consideration of feedback, we’ve decided to make some changes to both the timing of the inagurual season and the composition of leagues. We decided that it made more sense to split North America into three leagues, much like Europe. In the case of North America, the top six worlds will comprise the gold league and will battle each other in a clash of titans over a seven week period. The silver and bronze leagues will be made up of nine worlds each and will function exactly the same as the European leagues. We’ve made this change in order to have more competitive matches over the course of the season, while still retaining the variety of matching up with a wide swath of worlds during the season.


We have subsequently decided to delay the beginning of season one until Friday, October 18 in order to properly test the changes that we have made. We felt it was in the best interests of everyone that we make this change to the North American matchups and that we do our due diligence to make certain that it wouldn’t negatively impact any other aspects of the season. In addition, this will align the season start with upcoming balance changes, allowing us to maintain this balance through the duration of the season and across the entirety of the game.

The scheduled refunding of all spent World Ability points will still occur on October 1, and there will be no additional refund prior to the start of the season. In addition, we will be introducing bonus WvW rank up chests as rewards for placement during a matchup on October 1. At the end of every matchup of WvW players will receive one, two, or three bonus chests depending on their server’s performance. These chests are no longer character bound and will apply to your account instead. This is a permanent addition to WvW and will continue regardless of whether a season is active or not.


We are confident that season one is going to be a great success and that this new format is going to be even better than what we had previously planned. Season one will still have all the great features we’ve previously discussed, just starting two weeks later. We look forward to watching the results come in over the course of the season and to representing our chosen worlds in their fight for glory.

Cheers,
Devon Carver


Source: https://www.guildwars2.com

Tuesday, July 23, 2013

Guild Wars 2 - Cutthroat Politics Campaign Guide

Spoiler-Free Guide

  • When you log in to Guild Wars 2, you’ll receive a mail from both Captain Evon Gnashblade and Captain Ellen Kiel detailing the current situation. Each Captain is trying to accrue influence with the Zephyr Sanctum and will offer you a Support Token to get started on helping their cause. Click the “Show Me” button at the bottom of the mail to find out where to take your Support Token.
  • Go to the Zephyr Sanctum in the Labyrinthine Cliffs and enter the story instance “Audience with the Master” to view a scene between Evon Gnashblade, Ellen Kiel and the Sanctum’s leader, the Master of Peace. Here, you will learn more about the fight for the trade agreement  and your role in deciding the winner!
  • To get to the Labyrinthine Cliffs, head to Lion’s Arch and look for the Labyrinthine Cliffs Transport Facilitator in Sanctum Harbor. He is marked on the map with a gold star sailboat icon and is in the same spot that was used to ship players over to Southsun Cove before the asura portal was finished.
cp-guide-01

How Can I Support My Candidate?

Showing Support
  • Support baskets for Gnashblade and Kiel have been set up near the Zephyrites’ water supply on the Zephyr Sanctum in the Labyrinthine Cliffs.
  • Each time you cast a Support Token,you will be awarded with a Representation Button. Use this button to show support for your candidate while playing content to advance certain achievements.
A few tips:
  • Support Tokens can be acquired from slain mobs; in dungeons; by participing in Candidate Trials, Southsun Survival and Aspect Arena; and in World vs. World. They can also be purchased from the vendor Shady Quill.
  • The Zephyrites will stop accepting Support Tokens on August 5 at 11AM PST in order to start counting them up. Be sure to turn in your Tokens before then!

Candidate Trials

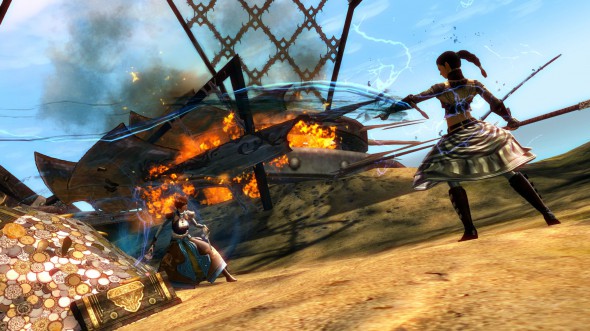
  • Enter into the Candidate Trials, a repeatable instance for solo or group play, to test your mettle and support your candidate! The Lionguard has brought down an Aetherblade airship, and it’s up to you to secure the crash site so that your candidate can capitalize on the situation. There are four levels of difficulty – see how long you can hold out!
  • You can choose which Candidate to support by entering the Candidate Trials marked with Gnashblade’s or Kiel’s image. Each entrance will be in the Labyrinthine Cliffs, near the Captain they are tied to.
  • This event can be challenging, particularly at higher tiers.  If you begin to struggle, consider tweaking your play style and gear to adjust to the situation.
A few tips:
  • Various weapons have been provided to help players defend the treasure piles in the crash site.
  • Keep an eye out for Aetherblades who are only focused on the gold.
  • Dutiful protection of the treasure may be rewarded with Aetherized Weapons taken from the pirates! Keep in mind that the higher your tier, the better your chances for Aetherized rewards!
  • When attempting Tier IV, consider bringing a highly skilled, coordinated party that works well together in order to deal with all the pirates throw at you!
  • In order to complete Gnashbalde: Direct Support, you must complete both Tier I and II in Gnashblade’s Candidate Trials. To complete Kiel: Direct Support, you must complete both Tier I and II in Kiel’s Candidate Trials.
cp-guide-02

Aspect Arena

  • This new PvP team match is being hosted by Captain Ellen Kiel and can be entered by talking with her in the Labyrinthine Cliffs. You will be able to choose between the Sun, Wind, and Lightning Zephyrite fighting styles . Collect as many crystals for your team as you can within the time limit to secure victory.
A few tips:
  • Once in the Labyrinthine Cliffs, Captain Ellen Kiel will be marked on the map with an activity flag marker.
  • In the Arena, look for the aspect icons as hints on where to use a certain Aspect’s fifth skill for movement. Portals with a Sun emblem on the floor might be a prime location for a Light Dash…
  • Frequenters of the Arena have the opportunity to find a Zephyr Rucksack in their rewards!

Southsun Survival

  • This new PvP survival free-for-all activity is being run by the charismatic Evon Gnashblade and can be joined by talking to Captain Gnashblade in the Labyrinthine Cliffs. Up to 20 players will be dropped into Southsun Cove with only a bow with which to survive. Scavenge for supplies and kill other Survivors to become the last one standing and secure your victory.
A few tips:
  • Hunger is a constant threat in the wilderness of the cove; search for rations to keep up your strength.
  • After an initial grace period, Survivors who die will shift over to the mists. Mist walkers should look for blue motes to help them exact revenge on other Survivors. Note that only one Mist Walker can collect a mote, so later in the game those Revenge Motes will be hotly contested!
  • The creatures of Southsun Cove slowly move in from the beaches, be sure to check the status of a camp before you enter or you may find a deadly serving of karka.
  • Dedicated Survivalists have a chance to find a Desert Rose back item in their spoils.
Southsun Survival After Elimination: A breakdown of Mist Walkers and Revenge Motes
  • Imagine you’ve just stopped to scavenge for goods and a fellow Survivor hits you with a long distance Head Shot. The initial two minute grace period is over and now you’re out of the running for final Survivor. What do you do? Fear not –  you may be down, but you are far from out!
  • Eliminated players return to play as Mist Walkers! Mist Walkers are wisps of spirits returned to haunt the remaining Survivors.
  • Mist walker skills run off of Revenge Motes – ethereal blue motes that randomly appear in the wilderness and can be created by:
    • Survivors scavenging passiflora and miscellaneous goods
    • Survivors successfully attacking or trapping other Survivors
  • Stalk surviving players to collect the Revenge Motes they create as they scavenge for supplies and fight other survivors. The motes will allow you to use various skills against Survivors to hasten their demise.
cp-guide-03

Things to do in the open world

Supporting a Candidate for Achievements
  • Many of the achievements require you to support your candidate while performing things like events and dailies in the open world.
A few tips:
  • Be sure to cast your Support Tokens in the Support baskets in Zephyr Sanctum to earn Representation Buttons. These will allow you to show your support while participating in open world content!

Persisting Bazaar of the Four Winds Content

  • Labyrinthine Cliffs
    • The Bazaar of the Four Winds is still taking place in the beautiful Labyrinthine Cliffs
  • Lessons from the Sky
    • The Zephyrite Sky Crystals are still around, so adventurers can  hunt for any crystals they have not found.
  • Sanctum Sprint
    • The races continue!  Enjoy the magical Zephyrite movements  in this high speed competition.
  • Belcher’s Bluff
    • Make sure you don’t miss your chance to face Poyaqui, the Grandmaster of Om, before he moves to Lion’s Arch!
  • Trade opportunities
    • The Zephyrites are still accepting land based supplies in return for their Zephyr Supply boxes. The Zephyrite kid is hoping to load up on Tyrian sweets before the Sanctum departs!
  • Kite Baskets
    • These baskets, filled with Zephyrite goods, are still landing across Tyria for explorers to find!
  • Stolen Kite Baskets
    • Those hoarding skritt are still guarding their pilfered baskets closely; can you find them in some of Tyria’s most challenging jumping puzzles.

Monday, July 1, 2013

Guild Wars 2 - "Teach Me PvP" Guide with WoodenPotatoes - EP1 Basics


These are of course the basics to PvP that many may know already but we dont want to leave out the people that may not know.

Thursday, June 20, 2013

Upcoming Skill and Trait Changes

Hey folks, it’s Chap again! There are a lot of changes coming in this release, and I wanted to explain the thought processes behind some of them. Today I’ll be joined by Karl and Roy, two members of our skill and balance team!

Build diversity

One of the things we’ve focused on is making sure that each class has more build diversity. To do this, we revised some traits, combined others, and in some cases, removed certain traits completely and added new ones in their place.
We also looked at small skill revisions and number balances to boost the power of specific skills, weapons, and traits. When possible, we try very hard not to take away too much potency from popular builds because we know that a lot of people enjoy them – but occasionally we do need to bring some abilities down in power. Why don’t we just increase the power of weaker skills to match the most popular ones? Well, the problem is that then we get into something called power creep; the power of all builds and classes keeps rising as we keep making improvements, which causes instability in game balance.
And now I’ll leave it to Karl and Roy to get into more detail about some specific changes you’ll be seeing in the world of Tyria after this release!
Hello fellow Tyrians! I’m Karl McLain, a game designer involved in skill development and balance, and I’m here to tell you about some of the cool stuff that we’ve been working on for this release.

Trait Changes

First off, we’ve got a ton of trait changes coming up. Many traits that were less than desirable have been brought up in effectiveness, while others have been shuffled around and merged together to make room for new traits to be introduced. In doing this, we’ve created several new grandmaster traits for quite a few trait lines. For example: elementalists have a new grandmaster Air trait that allows them to recharge their air attunement, necromancers now have access to the burning condition, and warriors will have an option to remove conditions when using burst abilities.
With these changes in mind, we are going to be making a few builds a little harder to achieve due to their extreme effectiveness. Some traits will go up in tier while increasing in potency to promote build variation.

Necromancer Death Shroud 5

As the professions in Guild Wars 2 continue to grow, we will continue to find ways to augment them and add potency to their arsenal of abilities. With the next balance update, necromancers will be unlocking their fifth ability within Death Shroud: Tainted Shackles. This skill will cause nearby enemies to be inflicted with conditions and controlled if they don’t take very quick action.

New condition

With the introduction of Tainted Shackles, we’ll also be adding a new condition to the game: Torment. This condition is designed to play around with movement, one of our fundamental combat mechanics. Enemies under Torment will take damage periodically; as they move, they’ll take even more damage. In looking to expand the condition diversity of thieves and mesmers, we decided to include Torment skills for those two professions as well.
Hey everyone, I’m Roy Cronacher, and I’m a Game Designer on the balance team. I’ll be discussing the upcoming changes to the Weakness condition as well as some of our larger skill changes.

Weakness condition change

We have a very interesting change coming to Weakness condition. Currently, Weakness decreases endurance regeneration and causes non-critical hits to have a chance to become glancing blows. We wanted this condition to punish spike damage, but it was a bit underwhelming because critical hits, which are essential to spike damage, have previously bypassed Weakness’s effect. Weakness will now cause all hits, both critical and non-critical, to have a chance to become a glancing blow. We went through and rebalanced a lot of the weakness durations for this change. We think this change will make the condition more meaningful and give it much more play.

Stun Breakers

As mentioned above, a lot of our skill changes were made to promote more build diversity in each profession. One key area we looked at was the accessibility of stun breakers. Many professions have been limited to playing one or two certain builds because stun breakers were limited to certain types of utility skills. In some utility skill types, stun breakers were over-abundant; in others, they were non-existent. We removed some and spread them out across more utility types. For example, the elementalist’s stun breakers have always been loaded up on cantrips, so we spread some out to the other categories like glyphs and signets. This way most builds have at least one viable stun breaker.

Closing

So that’s it! Thanks for reading, and be sure to check out the patch notes for the details on all of the incoming changes! We tried to give all the classes in Guild Wars 2 some great changes to less-used skills, traits, and weapons!
See you in game!

Tuesday, April 23, 2013

Guild Wars 2 - April 30th Patch Preview


Flameseeker Chronicles: April's Guild Wars 2 patch brings custom arenas, spectator mode, and a living story dungeon.

It is time to start talking about Guild Wars 2's April update for reals. I've got some serious knowledge to drop on you regarding the Flame and Frost: Retribution update, so let's get right to it.

Retribution will be the final installment of the Flame and Frost living story arc. To tie everything off, we're getting a new story dungeon that'll take us deep underground into the Molten Weapon Facilities. Structured PvP is getting some love in the form of custom PvP arenas and spectator mode. Guilds are getting more missions and new rewards. The gem store will be getting new stuff.

Let's dive in and look at some specifics, shall we?

Molten Weapon Facilities

The final act of our struggle against the Molten Alliance is coming up. We're going to fight alongside Braham and Rox as we take the fight to the enemy.

Let's back up a step. If you're new to the game or have been ignoring the living story content so far, here's the skinny: The Molten Alliance is made of Charr from the Flame Legion and their new buddies, the Dredge. They've teamed up and have been terrorizing folks in Diessa Plateau and Wayfarer Foothills. In the process of helping refugees, players have been introduced to the Norn Braham and Rox the Charr. Together, we've beaten back the Molten Alliance. Now the time has come to pursue them into their stronghold and end the threat for good. Our goal is to rescue captives and bust up as much Molten machinery as possible.

The dungeon hasn't been built by the normal dungeon team. Instead, it was tackled by the same folks who made the Halloween and Wintersday instanced content. The whole dungeon builds up to a final boss encounter. You'll be prepared for that encounter by all the mobs you destroy on your way through the dungeon; you'll see a certain mechanic right up front, then a different one once you've learned to handle the first, then perhaps both in combination, so that by the time you get to the big finale you're all ready to kick butt and take names.

The dungeon is balanced to be somewhere "between story and explorable modes" in terms of difficulty. (Given that I can name a few explorable mode dungeons that are way simpler than some of the story modes, that rating needs to be taken with a grain of salt.) The team expects that it'll take really experienced and skilled teams between 30 and 45 minutes to complete (that length is due in part, I'm told, to a little bit of time-gating), while less coordinated teams will find themselves spending an hour or so inside.

As living story content, the dungeon will be available only for a set amount of time. Because of that, it can have pretty neat rewards -- "really cool ones" that "you'll want to come back for." There's no need to run the dungeon multiple times to get the whole story, but folks who do go in multiple times over the course of its presence in the world will find that it changes over time. There's variety in some of the things that happen and combinations of enemies in order to give players the feeling that they're not just ransacking the same facility over and over. To reinforce that, the entrances and exits to the dungeon will be moving throughout the cycle.

Structred PvP updates

ArenaNet is bringing in some major support for sPvP. We've seen a bit of this with different queue structures, changing tournament types, new maps, and the recent introduction of  leaderboards. The team is stepping up its game, however, with the incoming patch. Custom arenas and spectator mode will both be making their beta debut.

Let me be right up front with y'all: Aspects of this are going to be limited. Specifically, only a small pool of players will initially have the ability to create a custom arena. However, anyone will be able to play in custom arenas or access spectator mode. I'm not really sure how that "small pool" of players graced with the ability to create custom arenas will be defined, but I know a bunch of other stuff.

Things I know, for example, include that arena starter kits and time tokens will be available through the gem store. The starter kit will, as you may have guessed, allow you to set up your arena. It also comes with a month of time for your custom space. Time tokens will be necessary to keep your arena open after that month. Anybody can contribute time to an arena; if you're splitting with your guild, or you spend a lot of time in someone's arena and want to help out, you can totally just apply your time token to it and be good to go.

You have all sorts of controls over your custom arena, should you have both the capacity and interest to make one. You can set a name, a password (or a lack of password), a logon message, the team size, the time and score limit, the respawn type and timing, whether or not the "ready" button is in use, the number of players required to kick the game off, the number of slots that are reserved for members, the membership list, the list of banned players, map rotation, whether or not you want progression (that is, if kills, losses, and the like will be recorded), whether you want players to be able to swap out gear and skills, and whether or not autobalancing happens.

That's a lot of options! To help you navigate them, ANet has overhauled the browser to be way more helpful and informative. You'll be able to see which custom arenas you can join and search by certain settings. You can also save custom arenas as favorites so they're easy to find.

Spectator mode will be available for hotjoinable sPvP and in custom arenas. As you enter a match, you'll have an option to join as red team, blue team, random team, or spectator. You'll be able to pick a player's point of view to see from; this will allow you to inspect all of her gear, traits, and skills. You'll also be able to choose from fixed cameras that hang out near high-traffic areas if you'd rather see combat around a specific point rather than the way a single player is maneuvering.

At present, spectator mode is possible only for live spectating, without any option for playback. While that might be less useful for newbies getting used to the game and wanting to check out what their foes were up to, live commentary and spectating is probably a much more immediate concern for the health of the PvP community. The team is, of course, "always looking at a variety of features to add."

April's Retribution patch will bring in other goodies, too. There's a new ability for arrow cart mastery as well as five new levels for the guard killer ability line. New guild missions (including a new guild rush that includes turning into Quaggans, awwww yissss!) are being added. You can now purchase WvW siege equipment decorated with your guild's logo. You can also get "back banners" that display your guild's logo. I'm not certain how a back banner differs from a cloak or cape, but apparently it does. My personal bet is that these back banners will be on the higher end of personal rewards. My other personal bet is that, sans substantial evidence that they're truly different from cloaks, the name of back banner will not stick around long in player parlance. And because money is made for spending, there will be new items in the gem store. The sonic tunneling tool will allow players to travel for short distances underground. You'll also be able to buy four new weapon skins, two of which are weapons belonging to our buddies Rox and Braham.

You'll be able to check all of this content out when it goes live a week from now. Until then, stay classy Tyria.

Source:http://massively.joystiq.com 

Friday, February 8, 2013

Guild Wars 2 - Mesmser Support Guide


Mesmer Support Guide by: Hiname

Hello and good day or evening.
Today I want to share with you with you my personal way of playing my mesmer.
People have two oppinions of the mesmer... They are either "zomfg OP!" in every PvP enviroment, or Time Warp bots in dungeons. Well, for the later category, you might be the people who have the most of a blast with this build I want to present today.
I don't know if it is new, I don't know if it is inovative in any form whatsoever, but I want to share my little piece of joy with you.
I call it, Boon-Booze... yeah yeah, I know, name pending.
So, what is this about?
Firstly, details of gearing.
You will need: Carrion equipment. Conditions will be something of a sideeffect of what you will do.
2 Superior Runes of Water - +25 Healing, +15% Boon Duration
2 Superior Runes of the Monk - +25 healing, + 15% Boon Duration
"MAJOR" Runes of the Sanctuary - +15 Vitality, + 10% Boon Duration
2 Superior Sigils of Battle - Gain 3 Might when switching to this weapon in combat.
1 Superior Sigil of Corruption - Gain condition damage upon slaying an enemy.
A scepter.
A staff.
A focus.
Everything together? Brilliant, then let us have a closer look at the traits.

10 Domination
VI: Signet Mastery - Signets recharge 20% faster.
You will need your one signet a lot. This one will be your best friend.
Chaos 30
V: Debilitating Dissipation - Clones apply a random condition when they are killed.
Your clones will die, fast and ahrd and not always reach their target, they might just as well make some use for them.
X: Chaotic Dampening - +50 toughness while holding a staff, 20% reduced staff cooldown.
Your staff skills will be your bread and butter. Hands down.
XI: Bountiful Interruption - Gain a random boon when interrupting an enemy.
For that sweet little twist later.
Illusions 30
V: Master of Misdirection - Confusion you inflict lasts 33% longer.
Conditions, hooo!
VII: Illusionary Elasticity - Bouncing attacks gain an additional bounce.
For your bounding staff goodyness.
VIII: Dazzling Glamours - Glamour-Skills blind enemies in their radius.
Because Feedback, Null-Field and all the others are cool.

Now, where does all this take us?
With your runes, your traits and an active Signet of Midnight, you stand at 80% Boon Duration. Now pop a Omnomberry Chocolate Cream and you have +100% Boon duration!

Execution
Now, after combat against a group of enemies has been initated, a good pattern of actions could look like this:
  1. Run up to the enemy, drop Chaos Storm so it does affect you,the enemies and every character in melee range.
  2. Let the random boons stack on you while you summon your Phantasmal Warlock.
  3. Use Phase Retreat to summon up another clone.
  4. Shatter the clones to trigger Shattered Strength.
  5. Swap to your scepter and focus while the clones shatter.
  6. Drop down Temporal Curtain.
  7. Trigger it again to pull enemies towards the rupture.
  8. Gain random boons by, hopefully, interrupting as many of them as possible.
  9. Steal some boons via Arcane Thievery.
  10. Hit your Signet of Inspiration.
  11. Squeel in joy when seeing your array of boons pop up in the entire group, putting your stacks of Might on top of theirs.
You might not be a tremendous DPS-Beast, but with this, you should be able to easily uphold ~10 Might in the group and let the rest of your companions show the enemies who is boss around the dungeon.
Me, as a person who has a genuine blast from playing support-heavy characters in my games and MMO's specifically, I can say, that this build is likely the best thing that could have ever happened to me.

Thursday, January 24, 2013

Player’s Introductory Guide to Guild Wars 2


Welcome to Guild Wars 2! Whether you’re new to the MMO genre or a veteran of other games, GW2 isn’t quite the same as anything you’ve tried before. To that end, there are plenty of things all new players need to know to start off right. While the in-game tutorial will teach you the most basic mechanics of the game, there is still much that need more explanation. Now, this guide isn’t going to tell you how to create the most overpowered character, or to be a PvP master, since those are apt to shift every patch. What we will cover is the basics of starting the game and its different modes, as well as a few helpful tips that will allow new players to start off in the best possible position.

Servers

The first thing any player must do upon logging into Guild Wars 2 is to select which Server to play on. Also called Worlds or Shards, Servers determine your team in WvW and the people you most often see in the world. If you have friends who also play, you will probably want to ask them which Server they are on so you can join them easily. But if you find yourself on a different Server from your friends, don’t fret! In GW2 you can still talk to, party, and play with friends from other Servers, you just won’t be able to go into WvW with them.
Once you’ve decided on a Server, time to create your character.

Races

First, you must decide what race to play as. There are five races to choose from in Guild Wars 2. Each race has their own appearance, story lines, and racial abilities. However, unlike other MMO’s all races can be all professions and racial abilities are fairly weak and not usable in PvP. There are no opposing factions to worry about, and all players are friendly when outside of PvP and WvW, no need to choose a race based on that. So don’t worry about trying to squeeze out a slight advantage or choosing the right faction, just play what you like!

 Human - Diverse and robust, the Humans of Tyria have endured much through the ages. Now unified under the nation of Kryta, Humans are led by their Queen and pray to their six gods for favors.

  Norn – Great northern warriors, the Norn look much like stout, oversized Humans but are a faction onto their own. They have a hunting-centric culture and the ability to shapeshift into various were-animals.

 Charr- An imposing race with feline features, the Charr are fierce combatants. Their culture is extremely militaristic, relying on strict discipline and ingenuity to secure their place in Tyria.

 Asura - An entire race of mad scientist midgets, the diminutive Asura have towering egos and a rodent-like appearance. Obsessed with advancing all forms of science and magic, they never miss a chance to remind everyone of their superiority.

 Sylvari - Plants imitating Humans, the Sylvari have an elvish nature and leaves, bark, and stems for flesh. Their earnest and curious nature is owed to their recent introduction to the world of Tyria, and they believe it is their duty to protect it from the Elder Dragons.

Professions

Next, you must choose your character’s profession. Each of the eight professions or classes in Guild Wars 2 possess their own, unique methods of attack, as well as the ability to heal themselves and provide aid to allies. Unlike other MMO’s there are no dedicated tanks or healers here, so don’t worry about what role will get you in groups and instead choose based on which profession will fit your play style best.

 Warrior - A versatile weapon master, the Warrior wields blades, guns and blunt instruments with unmatched proficiency, using them to tear through battle in a fury and build their adrenaline levels to unleash terrifying blows. Exemplifies the Knight or Berserker archetype.

 Guardian - With heavy armor and fanatical conviction, the Guardian uses massive Hammers and Greatswords to smash enemies, unbreakable Shields to defend themselves, and holy magic and virtues to help allies or trap foes. Exemplifies the Paladin or Magic Knight archetype.

 Thief - Specializing in stealth and poisons, Thieves rely on traps and tricks to escape from bad situations, aid allies, or get in position to steal from and assassinate their opponents with devastating attacks using Daggers, Swords, or even Pistols. Exemplifies the Assassin or Rogue archetype .

 Engineer - Possessing the most ingenious machines and potions throughout Tyria, Engineers use their cunning to modify their Pistols and Rifles with new tricks, wield a number of gadgets and explosives, and empower themselves with potent Alchemical concoctions. Exemplifies the Mechanic or Alchemist archetype.

 Ranger - With the ability to command nature’s most fearsome beasts, the Ranger also uses Long Bows to attack from afar, Greatswords to face a charging enemy and nature magic to fortify themselves, their pets, and allies. Exemplifies the Hunter or Archer archetype.

 Elementalist - Able to harness the immeasurable powers of the elements, Elementalists use Staves and Daggers enchanted with Fire to devastate their enemies, Air to zip around the battlefield, Earth to protect themselves and Water to restore their allies. Exemplifies the Mage or Wizard archetype.

 Mesmer - Bending the fabric of reality itself, Mesmers manipulate minds and bodies with Staves, Swords and Greatswords to help or harm others, open portals for allies and create illusionary clones to distract enemies before shattering them for powerful effects. Exemplifies the Illusion Mage or Magician archetype.

 Necromancer - Controlling the forces of life and death, Necromancers channel their power through Staves, Daggers, or Foci to summon horrific creatures of rotting flesh, curse their enemies, or even drain life away before using it to fuel their most fearsome spells. Exemplifies the Death Mage or Lich archetype.

Starting Tips

Once your character is created, you’re ready to go off into the world. Now, I can’t detail an entire game tutorial for you here, and any attempt would just pale in comparison to the tutorials the game gives you as you enter the world. So instead I’ll emphasize pay attention to the tutorial and tips, and give some extra tips everyone should know but isn’t always covered in-game.

  • The very first thing you should do in Guild Wars 2, and any PC game, is press Esc, go to Options, and carefully peruse every option and key binding available to you in the game. Adjust the settings to your liking, this will help you to learn the game and help it customize to your play style. 
  • One option that most players recommend disabling is “Double Tap to Evade” under the Combat/Movement header. While some players enjoy it, its generally considered to be a nuisance in combat and jumping puzzles and is better to give Dodge its own unique button.
  • Never be afraid to explore. Its a big beautiful world out there, and there’s no rigid quest hubs to tie you down, so go see it!
  • Starting at level 2, you can always teleport instantly, for free, to Lion’s Arch, the central city in GW2. Click the PvP icon  in the top left area of your screen and in the PvP window that appears click “Go to the Heart of the Mists.” This will take you directly to the Mists, the PvP hub of GW2. From here, you can click the same button again to go back to where you were, or continue past a short tutorial to go to the main hub where a teleportation gate to Lion’s Arch awaits. Lion’s Arch also possesses gates that will take you to any of the other cities in the game. Be sure to abuse this.
  • You can easily clear bag space at any time. To do so, open you Inventory window, click on the gear icon in the top right, and select Deposit All Collectables. This will send all your crafting materials to your bank, which can be access from any crafting table or NPCs in every city.
  • You can sell on the Trading Post anytime, anywhere. Also called the auction house, the Trading Post lets you buy and sell from other players from anywhere. The default shortcut key is ‘O’. Note that you will have to visit a Trading Post NPC to pick up any items or money you earn there.
  • Buy gathering equipment as quickly as possible. Harvesting Sickles, Logging Axes, and Mining Picks are available from most NPC merchants and will allow you to gather valuable crafting material  and Experience from the world around you. Be sure to find a merchant and start gathering as soon as you can.
  • Don’t be afraid of other players. Years of other MMO’s have taught people to avoid one another in the world, not helping others out of fear of ‘kill stealing’ or getting attack by hostile players. In GW2 there is no world PvP or ‘kill stealing’, every player attacking an enemy will get full Experience and their own loot drops. Also anyone can Revive a dead player by approaching them (default ‘F’), and it gives you Experience, so never avoid helping someone out!
  • Don’t squander money. Again, many other MMO’s give you exponentially more gold as you level up. Not true in GW2. While you will make more money as you level, it is not the crazy, exponential amount most new players expect.You can afford to spend money on what you’ll need, but its always a good idea to save up as much as you can, even one gold coin can be quite valuable at max level.
  • Learn to dodge. Observe your enemy’s movement carefully, and learn when and how to dodge their attacks. The quicker you get the hang of this the better off you’ll be. It may not feel very necessary at first, but later in the game it is your only hope of staying alive.
  • Learn Combos. These are skills that combine a ground effect (the “field”) with another skill (the “finisher”) to add special and powerful effects to skills. They’ll become essential to understand in the late game, and if you learn about them early, you can perform a lot of neat tricks. Be sure to check your skill tooltips to see which ones combo!.
  • Every time you use a Trait book (needed at levels 11, 40, and 60), all your character’s Trait’s are reset. You can use this to adjust your build or try out new ones.

PvP

PvP in Guild Wars 2, also called structured PvP or sPvP, consists of two teams of 5-8 players each on various maps that feature ‘Conquest’ style game play. Both teams fight to capture 3 nodes, gaining points for each node held, first team to reach 500 points wins. While all the maps have these 3 points as the main objectives, each have an additional mechanic unique to the map to spice things up.

To start, open the PvP window by clicking the PvP icon  along the top left of your screen, then click the ‘Go to the Heart of the Mists’ button that appears on the PvP window. This takes you to the Heart of the Mists, the PvP lobby in GW2. If it’s your first time, you’ll have to go through or skip a basic tutorial that does a decent job of drilling the basics of PvP into you. Continue on and you’ll find yourself in the lobby proper.

Here, everyone is level 80 (the max level), can access all skills and respec your traits at will. In addition, your gear will be automatically replaced by special PvP gear. This special gear is equal in power for all players, but you can customize the stats and bonuses you receive. Seek out the NPCs to the east and they will supply you with all the gear and upgrade components you could ever want. Be sure to check them out.


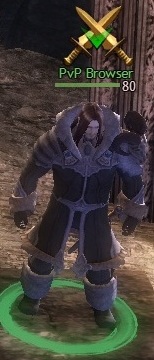
Getting started in PvP is simple, just go talk to the ‘PvP Browser’ NPC in the west side of the lobby and choose a match to head into. If you’re feeling lazy, you can just click the Play Now button in the lower left of the Browser window, but unfortunately that seems to have a tendency to throw players into matches devoid of other players.

There’s far more to PvP than just this, but you will now be able to get in there and begin learning the intricacies of PvP.

WvW

World Vs. World is one of the most unique and interesting features available in Guild Wars 2. It is a massive, 3-way war between three different servers labeled as red, green, and blue teams, represented by hundreds of players each. Each WvW match continues for a week of non-stop action before a winner is declared and servers are matched up again for the next round.

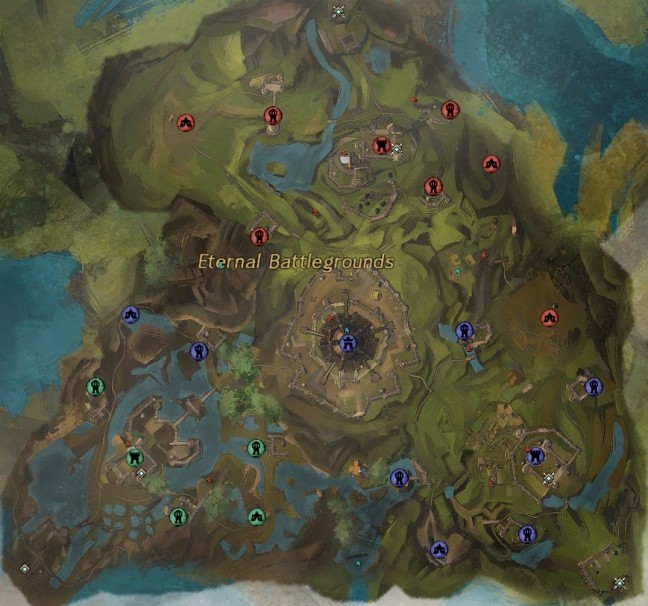
There are a total of four massive battlefields that compose WvW. Three of these maps serve as home base maps, one as a home for each server which generally owns the majority, but not the entirety, of their map. The fourth map, dubbed the Eternal Battlegrounds, serves as the central map for conflict as each server is given an equal slice of the map to occupy.

Here, the goal is for players to gather and coordinate to assault the other teams’ towers, camps, and keeps. Teams earn points every few minutes for every location they are in control of. These points can give bonuses to everyone on the entire server and ultimately determine the winner of the match. Players can pick up a resource known as  Supply in order to build vehicles to lay siege to locations and to upgrade or repair structures that their team owns.

tarting at level 2, any player can enter WvW at nearly any time. All players will be automatically leveled up to level 80, the max level, while in WvW. However, all your skills, traits, and gear will remain the same as they are in PvE. Because of this, higher level players will still have a significant advantage over lower ones, so some players may wish to wait until they reach a higher level before taking on WvW.


To enter WvW, simply open up the WvW window by clicking the tower icon  in the top left area of your screen, or by pressing the default hotkey of ‘B’. Now, Click on the ‘Go to World vs. World’ button button at the top of the window and select from the drop-down menu which map you would like to enter.


Upon entering a WvW map, its easy to get confused by all the icons crowding your map. However, its actually not very complicated once you understand it. The color of the icon denotes which world currently possesses that location. As for what each one means…

Resource Camp Resource Camp – WvW starts here. These small camps generate the Supply and Supply Caravans that power the rest of the buildings. Resource Camps by themselves have fairly weak defenses and, if undefended by an opposing team, can be captured by a small group of about 2-4 players.

 Supply Caravan – These caravans originate from Resource Camps and travel to the other locations, keeping them supplied with… well, Supply. Without regular deliveries from caravans, Towers and Keeps won’t last long against sieges. This is why it is often a good idea for enemies to target and destroy these caravans. Caravans by themselves are fairly weak and, if undefended by an opposing team, able to be destroyed by 1-3 players.

Tower Tower - Towers have a sturdy defensive wall and a small contingent of NPC defenders. They’re good for serving as bases for small groups of players looking to head out to further into the battlefield. If looking to assault one, its generally a good idea to set up a Ram to bust down the gate. Overall, their defenses are a bit stronger than Resource Camps and, if undefended by an opposing team, should be able to be captured by 4-7 players.

Keep Keep - Large bases with two separate sets of walls and a decent contingent of NPC defenders, Keeps provide an excellent base of operations for large groups of players. Siege vehicles are absolutely necessary when assaulting one of these. Has strong defenses and, if undefended by an opposing team, may be captured by 10-20 players. But don’t expect to capture these without heavy resistance!

Castle Stonemist Castle – The pinnacle of WvW, Stonemist Castle is located only in the center of the Eternal Battlegrounds. It is the largest structure in WvW and serves as a focal point of conflict. All servers want it, but only one can own it. Possessing two very sturdy sets of walls and a sizable contingent of NPC defenders, not to mention a massive defending force from the opposing team, be sure to bring as many players and siege vehicles as possible when assaulting this Castle.

And a few other icons worth recognizing right away…

Current Battle Skirmish -This icon shows up wherever a fight is currently going down. If you’re nearby, you’ll probably want to head over and help out!

Commander Commander – Commanders are players with this special icon over their heads. These icons denote them has generally being leaders of other players, so if you’re looking for something to do, try following one. To join a Commander’s group, click on their icon on the main and select ‘Join Squad.’

Of course, there’s far more to WvW and all of Guild Wars 2 then what is mentioned here. But this should provide you with the basics you need to know to get out there and start playing effectively. Good luck and get going!

Source: http://intothemists.com

Thursday, December 13, 2012

Wintersday TLDR notes from sneak peek articles

 PVE:
  • All wintersday daily events are on a 24 hour completion timer once activated.
  • 275 new crafting recipes, these are not all wintersday related.
  • Wintersday themed chests in Black Lion Trading Company.
  • build snowmen around the world much like pumpkin carving (probably part of the monthly achievement)
  • Tixx will drop presents from the sky when he flies around Tyria
  • Plans and materials will be present in said drops.
  • Jumping puzzle: Winter wonderland Jumping puzzle (frostbite debuff timed mechanic)
  • PvP Minigame: Snowball mayhem capture the flag pvp game (3 skillbar classes - Scout, Heavy, Support)
  • Activity: Bell choir rockband style 3 player per team mini game at the Lions Arch Snowglobe. (3v3 music battle?)
  • New scaling dungeon accessed via the golem airship. Each city will have content relevant to the home race and content will build as Tixx flies over each home town. (Dungeon is aimed at a 30 minute completion time)
  • Final instance event is a Horde mode meets tower defense minigame. (This sounds awesome).
WvW and PvP:
  • Siege weapons will be wintersday themed.
  • Holiday finishers are available.
Source: http://www.reddit.com/r/Guildwars2

Monday, October 8, 2012

If your not using food buffs in WvW, your doing it wrong!


Honestly. Also you could use the Master Maintenance Oil and other buffs like it that stack with your food buff as well (has a little wrench icon instead of apple). These greatly increase your stats as much as an extra piece of exotic gear and give you a huge upperhand in a battle, much like the orbs of power.

Before you pass this up as a waste of money/time, just check out some of the bonuses these buffs give you, its incredible.

Heres a quick list of cheap food buffs that you really need to know about :

Rare Veggie Pizza: (One of my favorites) +40% Condition Duration (O.o) +70 Condition Damage

Plate of Lemongrass Poultry: (another favorite) Gain vitality = to 6% of your toughness +200 power when your health is below 50%

Plate of Truffle Steak Dinner: +200 power for 30 seconds after killing any enemy +10% critical damage

Plate of Fire Plank Steak: +100 Power +70 Condition Damage (Power also increases condition damage, giving a compounding effect)

Orrian Steak Fries: +100 Power +70 Vitality

Omnomberry Cookie: +100 Healing +70 Vitality

Bowl of Truffle Ravioli: +100 Toughness +70 Percision

Bowl of Lemongrass Soup (good for tanks): -40% Condition duration on yourself +80 Vitality

Loaf of Omnomberry Bread (another great for tanks): +100 toughness +70 vitality

Spicier Flank Steak (if your a cheapo but still want buff): +80 power +60 Condition damage
and is only 3 copper per on TP. O.O

Curry Butternut Squad Soup: +100 Percision +10% critical Damage


And you can stack all these with a dif kind of buff such as Master's Maintenance Oil: Gain power = 6% of your toughness. Gain power = 4% of your vitality.

As you can see these buffs are very powerful, and theres many more, for all levels. All food buffs are very cheap with the most expensive being 2 silverish and most under a silver a piece. Do your server proud and atleast buff yourself so we can all prosper.

With the right food buffs, and not counting any orbs, I can get my Attack up to 3.3k, with 54% crit, with the orbs this gets up to 3.5k attack. These food buffs rock! and you'll be doing your server and the economy a favor by making cooking more viable at lvl 80.